Staking in ProverNet
BREV holders can stake and delegate tokens to provers on ProverNet. Delegation works similarly to proof-of-stake systems: provers with more delegated stake can take on more proving jobs, and in return they share a portion of the proving fees with their delegators.
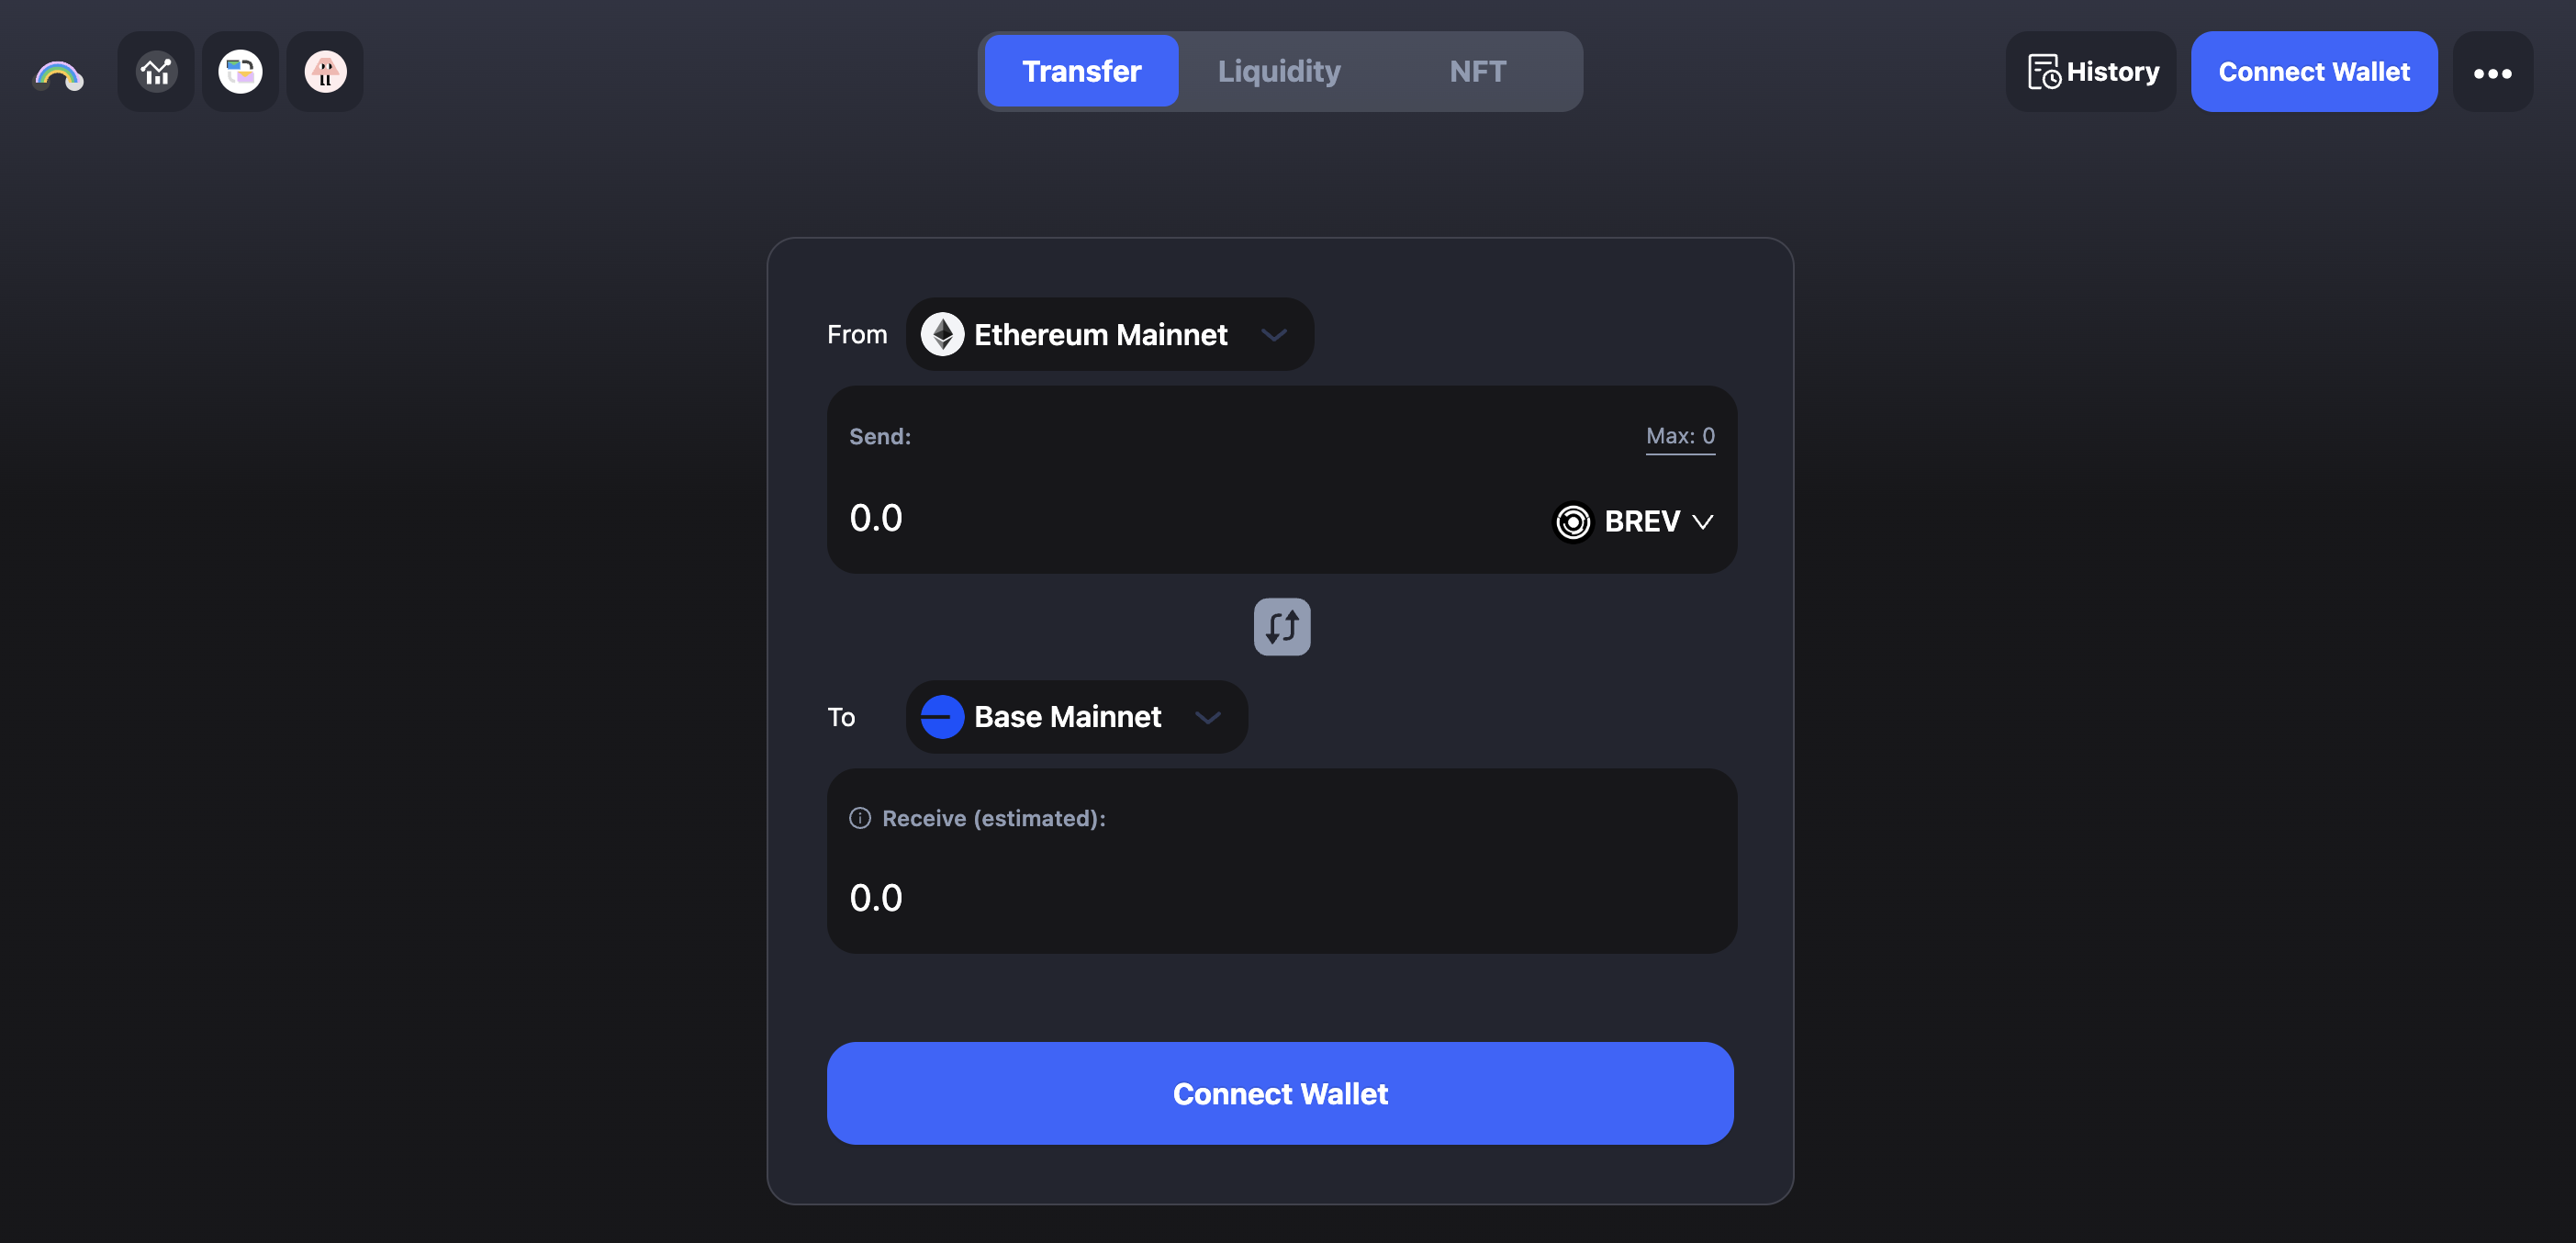
Bridge BREV to Base
ProverNet staking currently operates on Base. Before you start staking, you may need to bridge BREV to Base using cBridge.
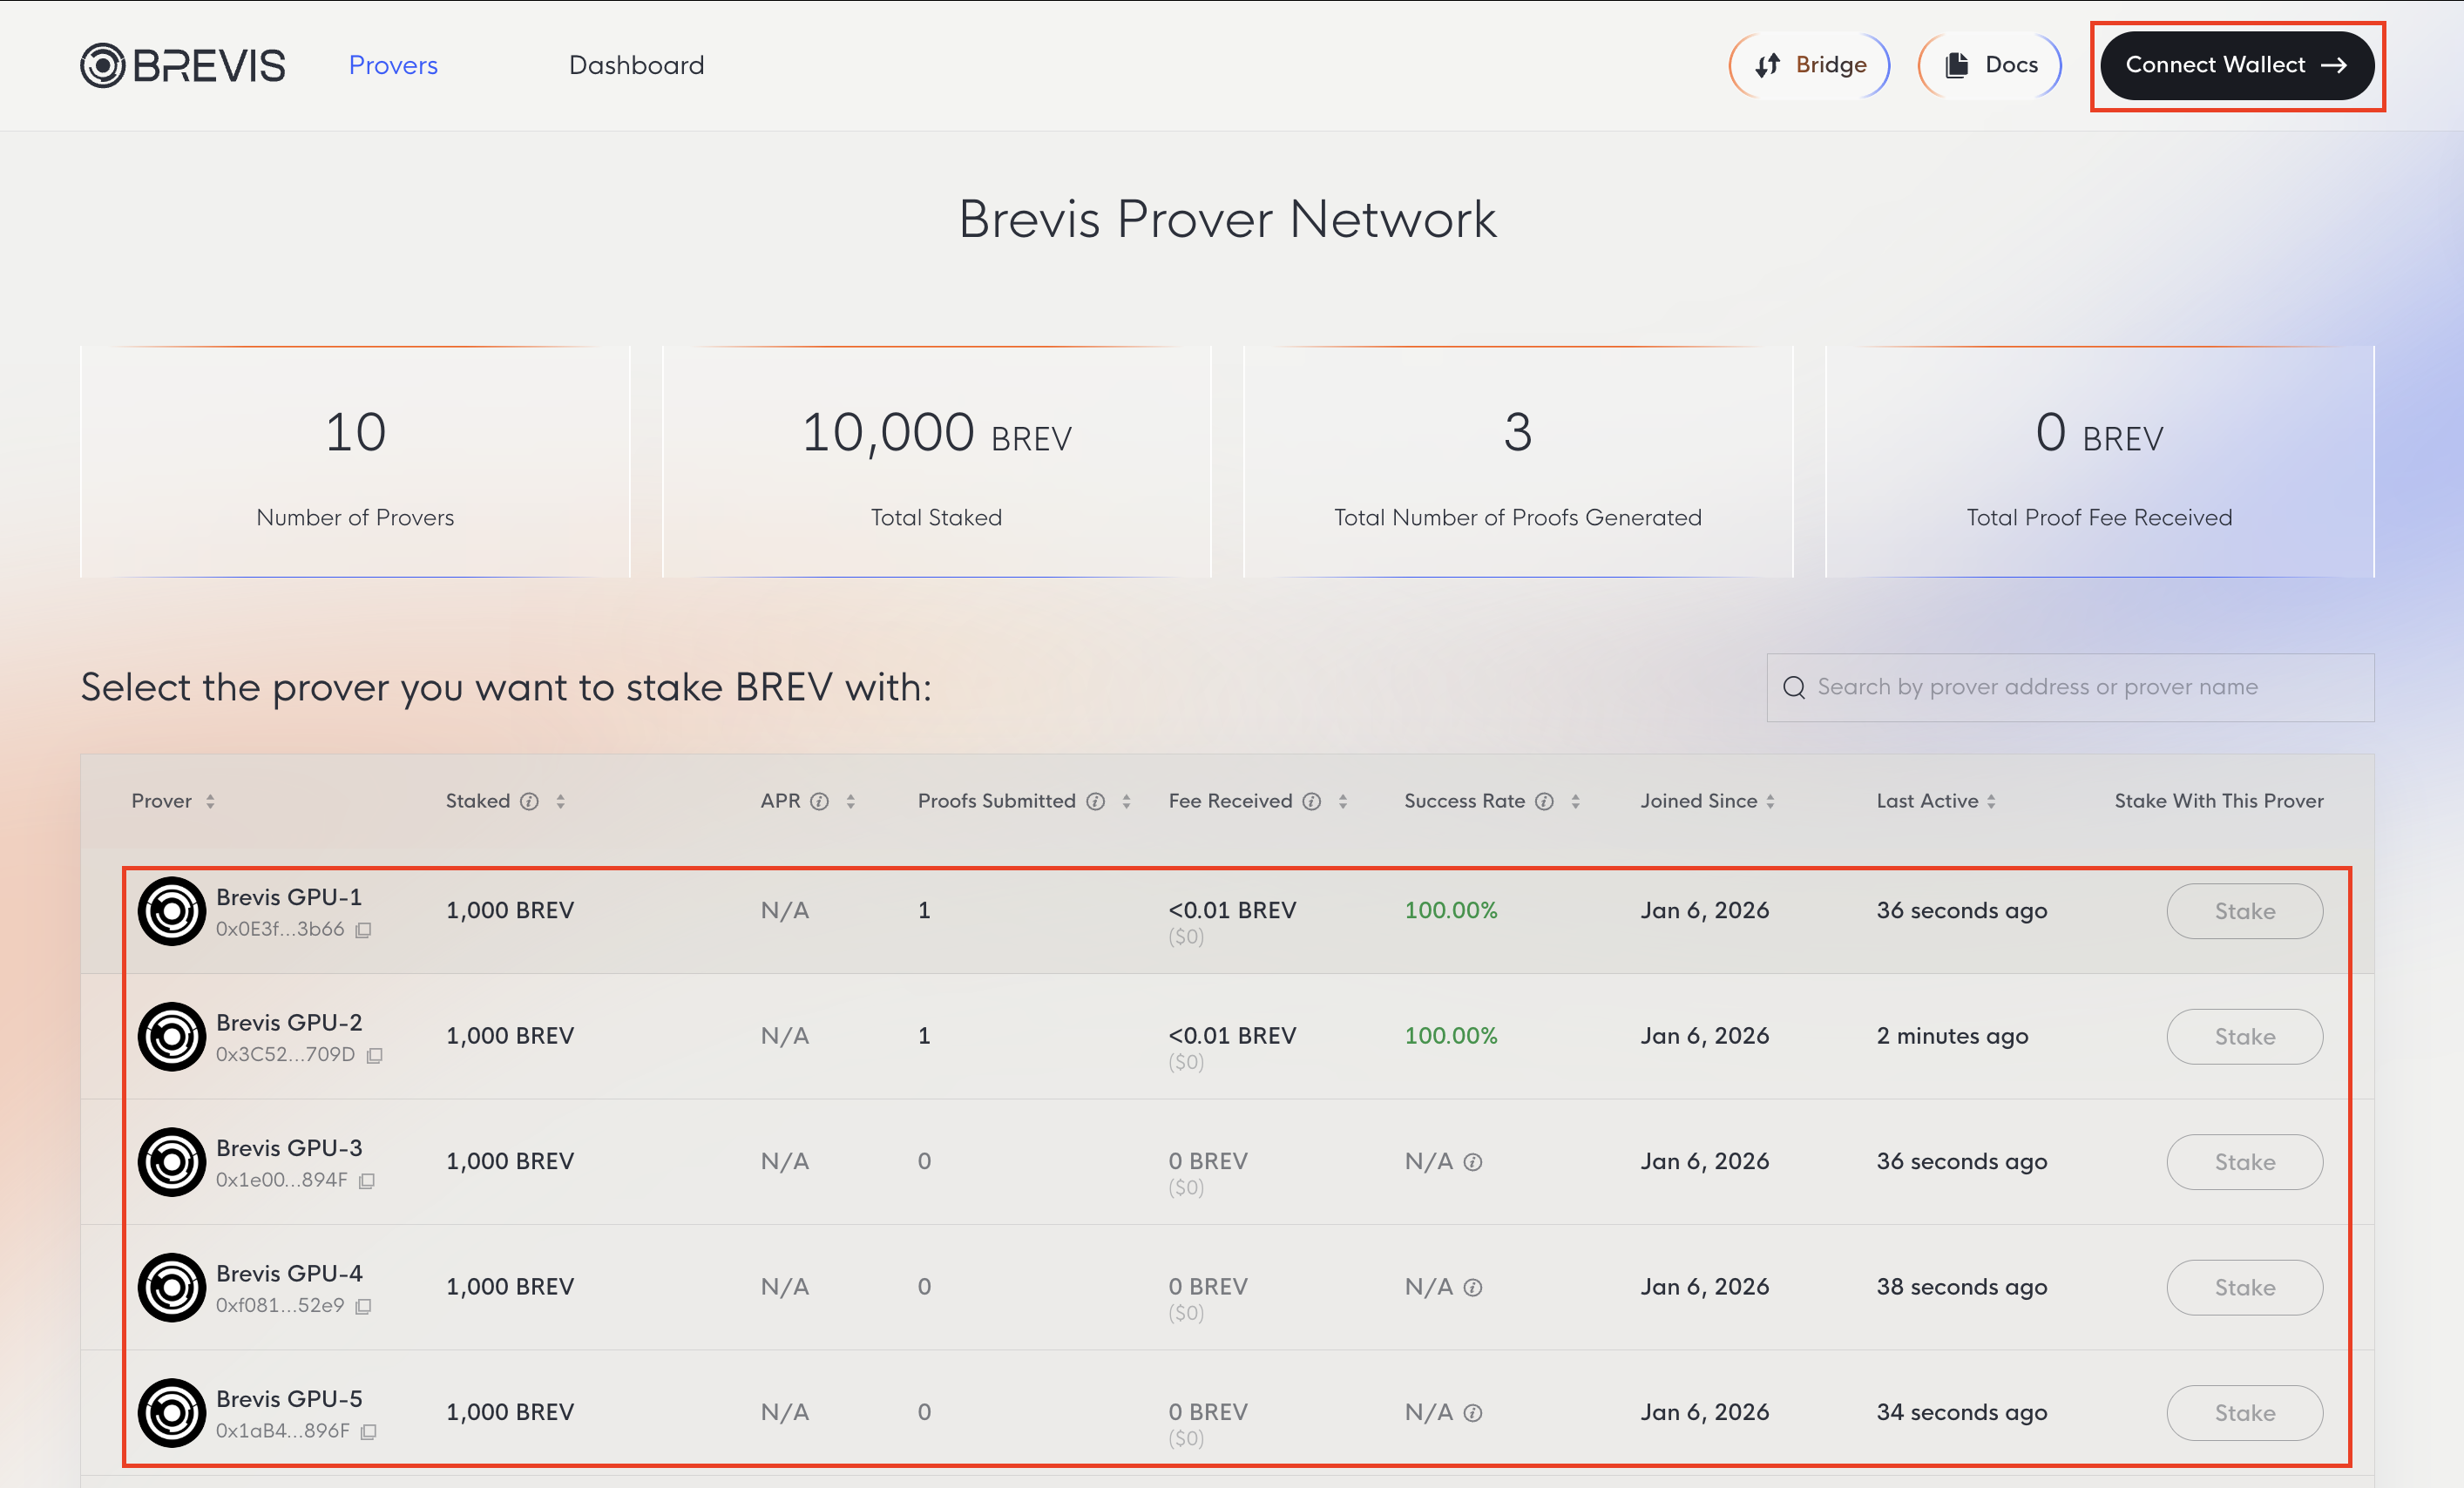
View Active Provers
Choosing provers with a record of actively participating and consistently meeting deadlines is essential for maximizing your potential rewards. While slashing is currently disabled, a prover’s performance may impact overall staking rewards; reliable nodes ensure your delegated stake remains productive.
Visit the Brevis Prover Network to view all active provers along with key statistics including BREV staked, proofs generated, and fees earned.
Stake BREV
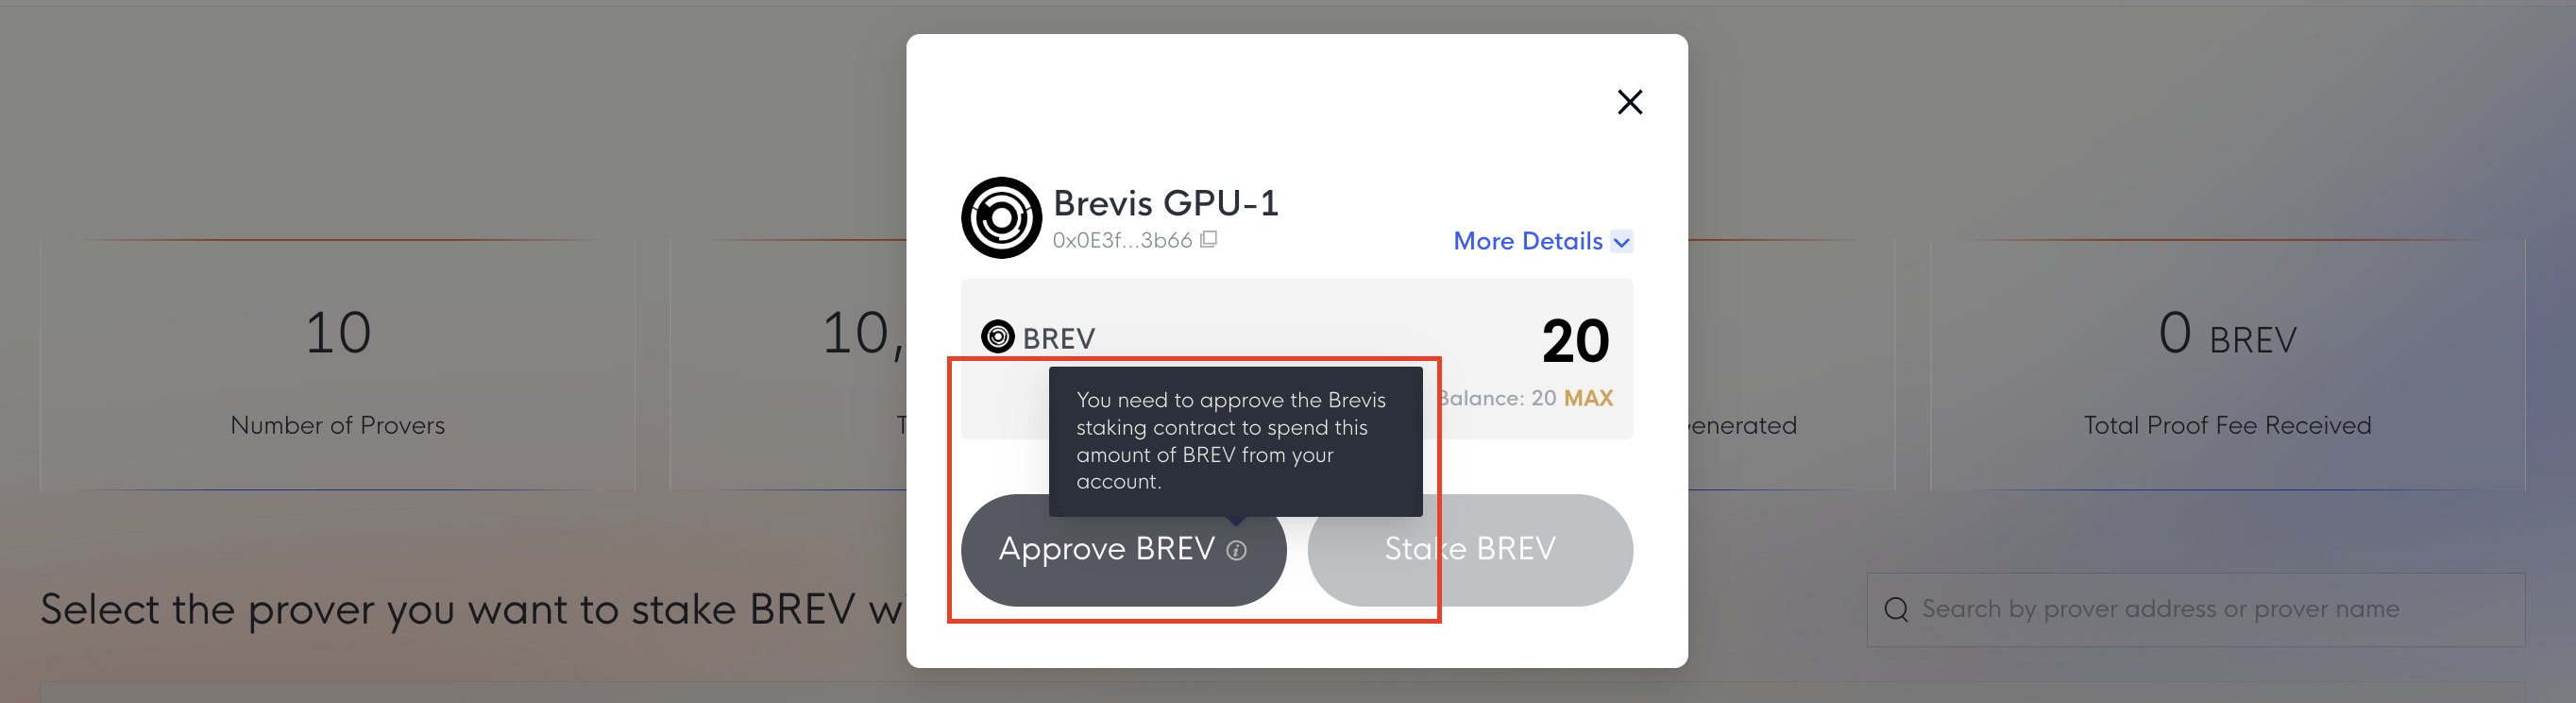
To stake, connect your wallet and select a prover.
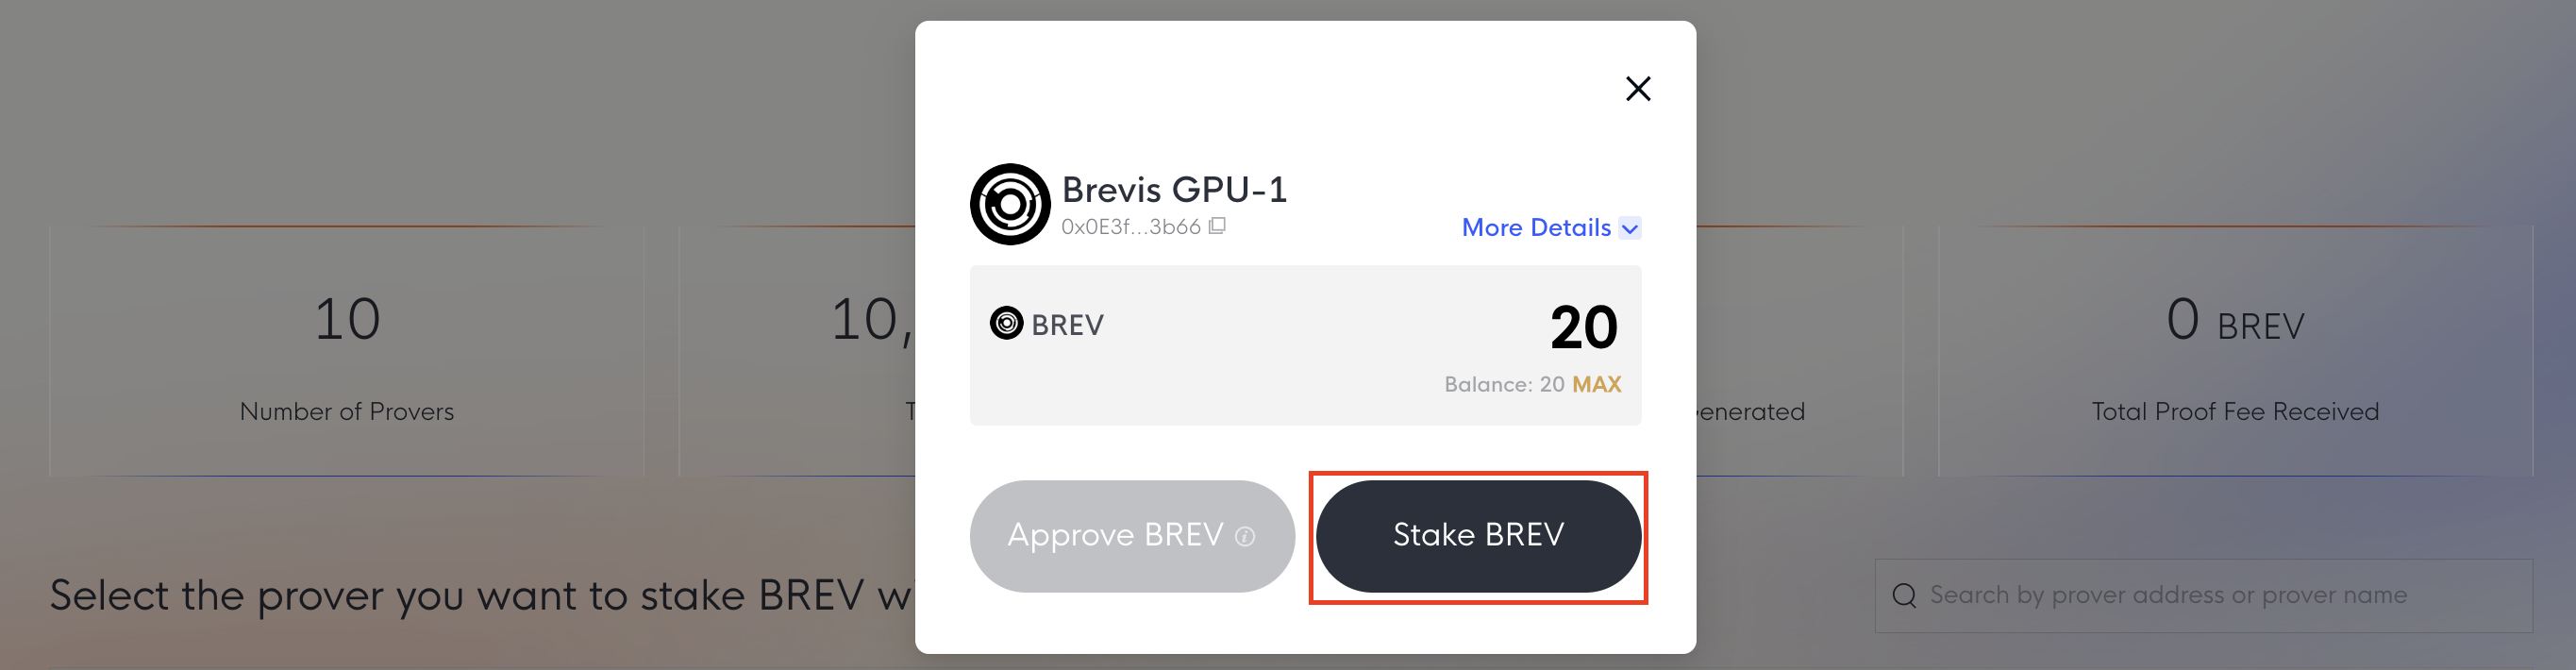
Once connected, the Stake button will be enabled.
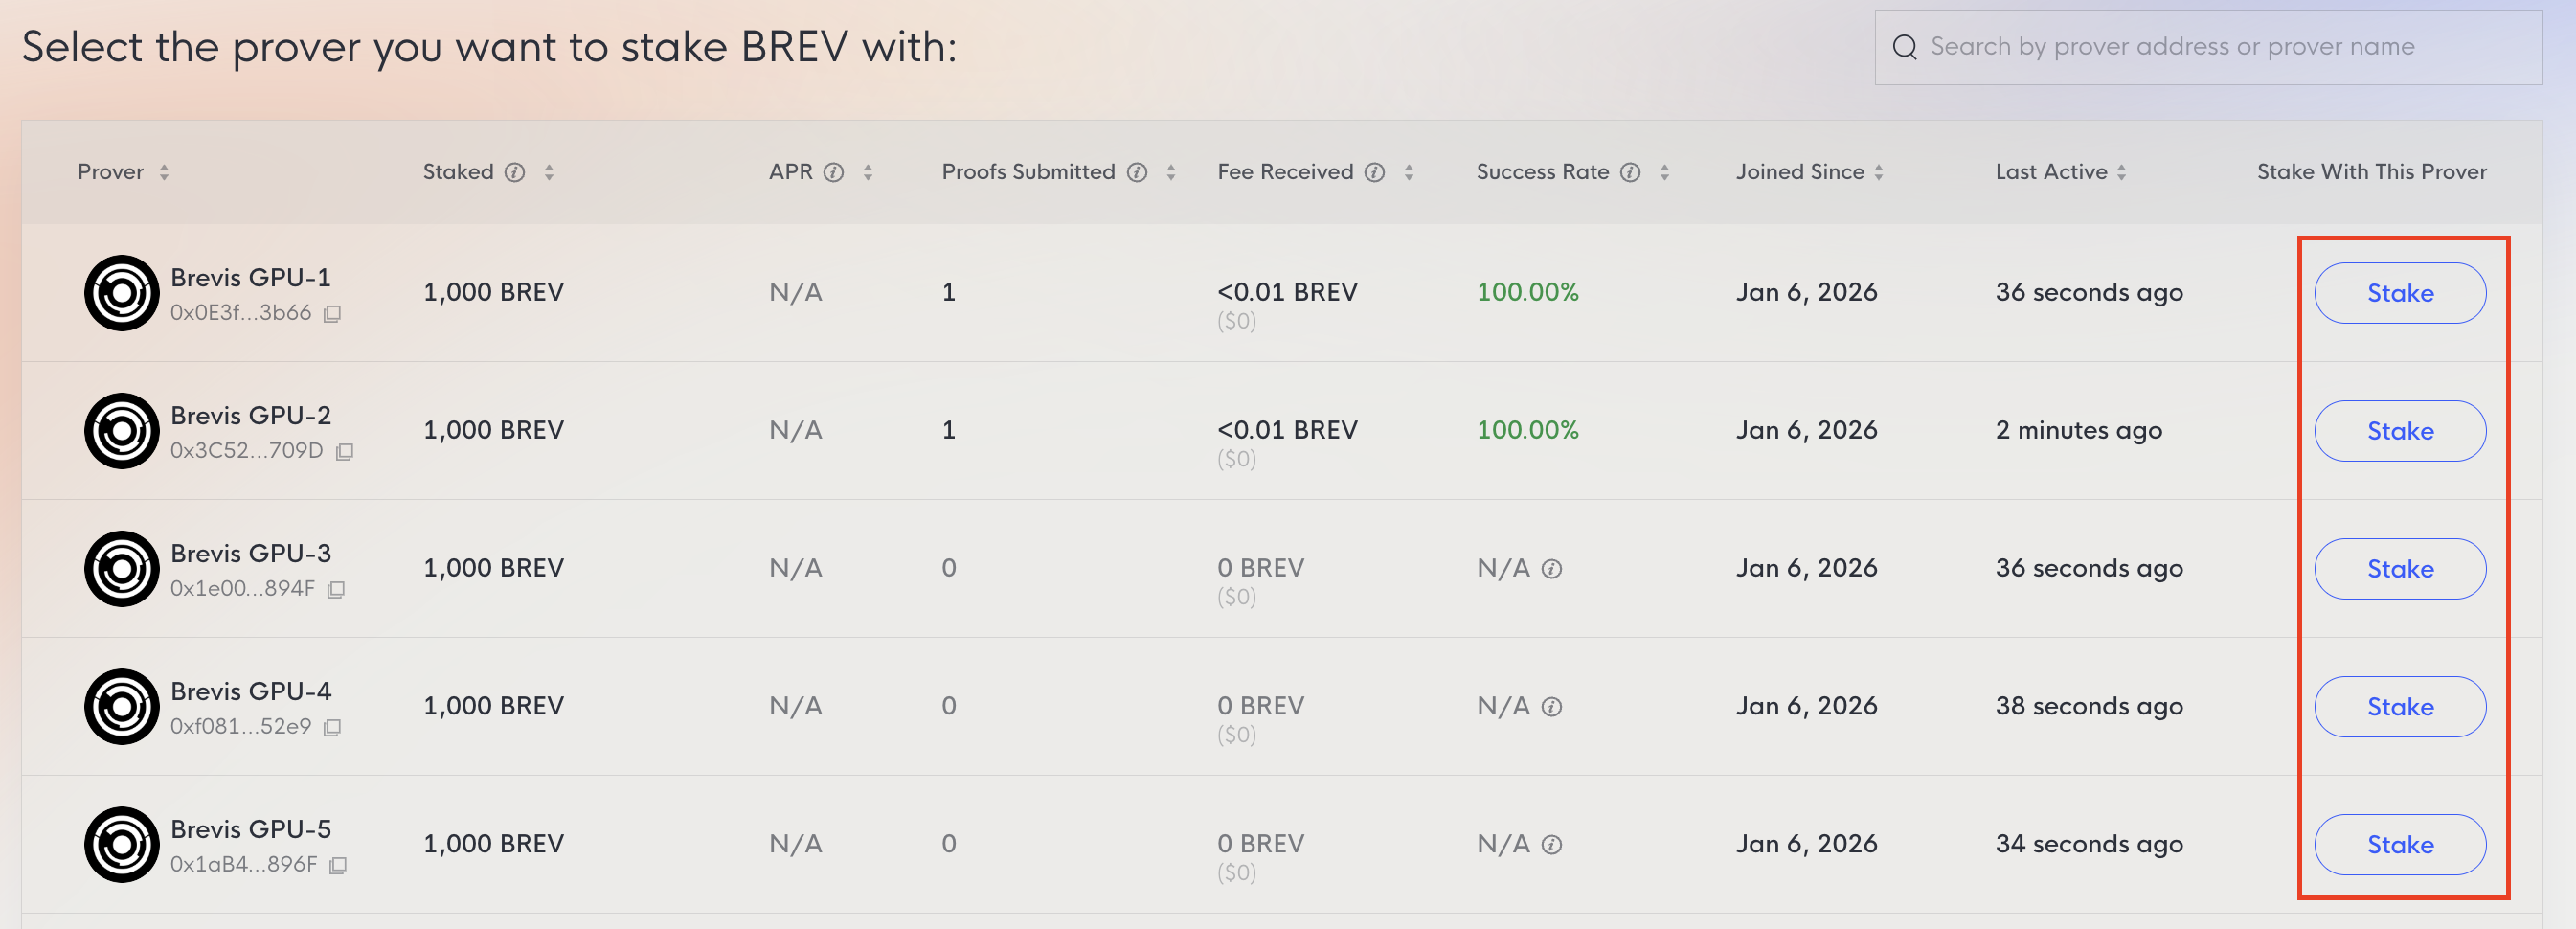
You may need to Approve the Brevis staking contract to allow the spending of BREV first. Once approved, you can submit the stake transaction.
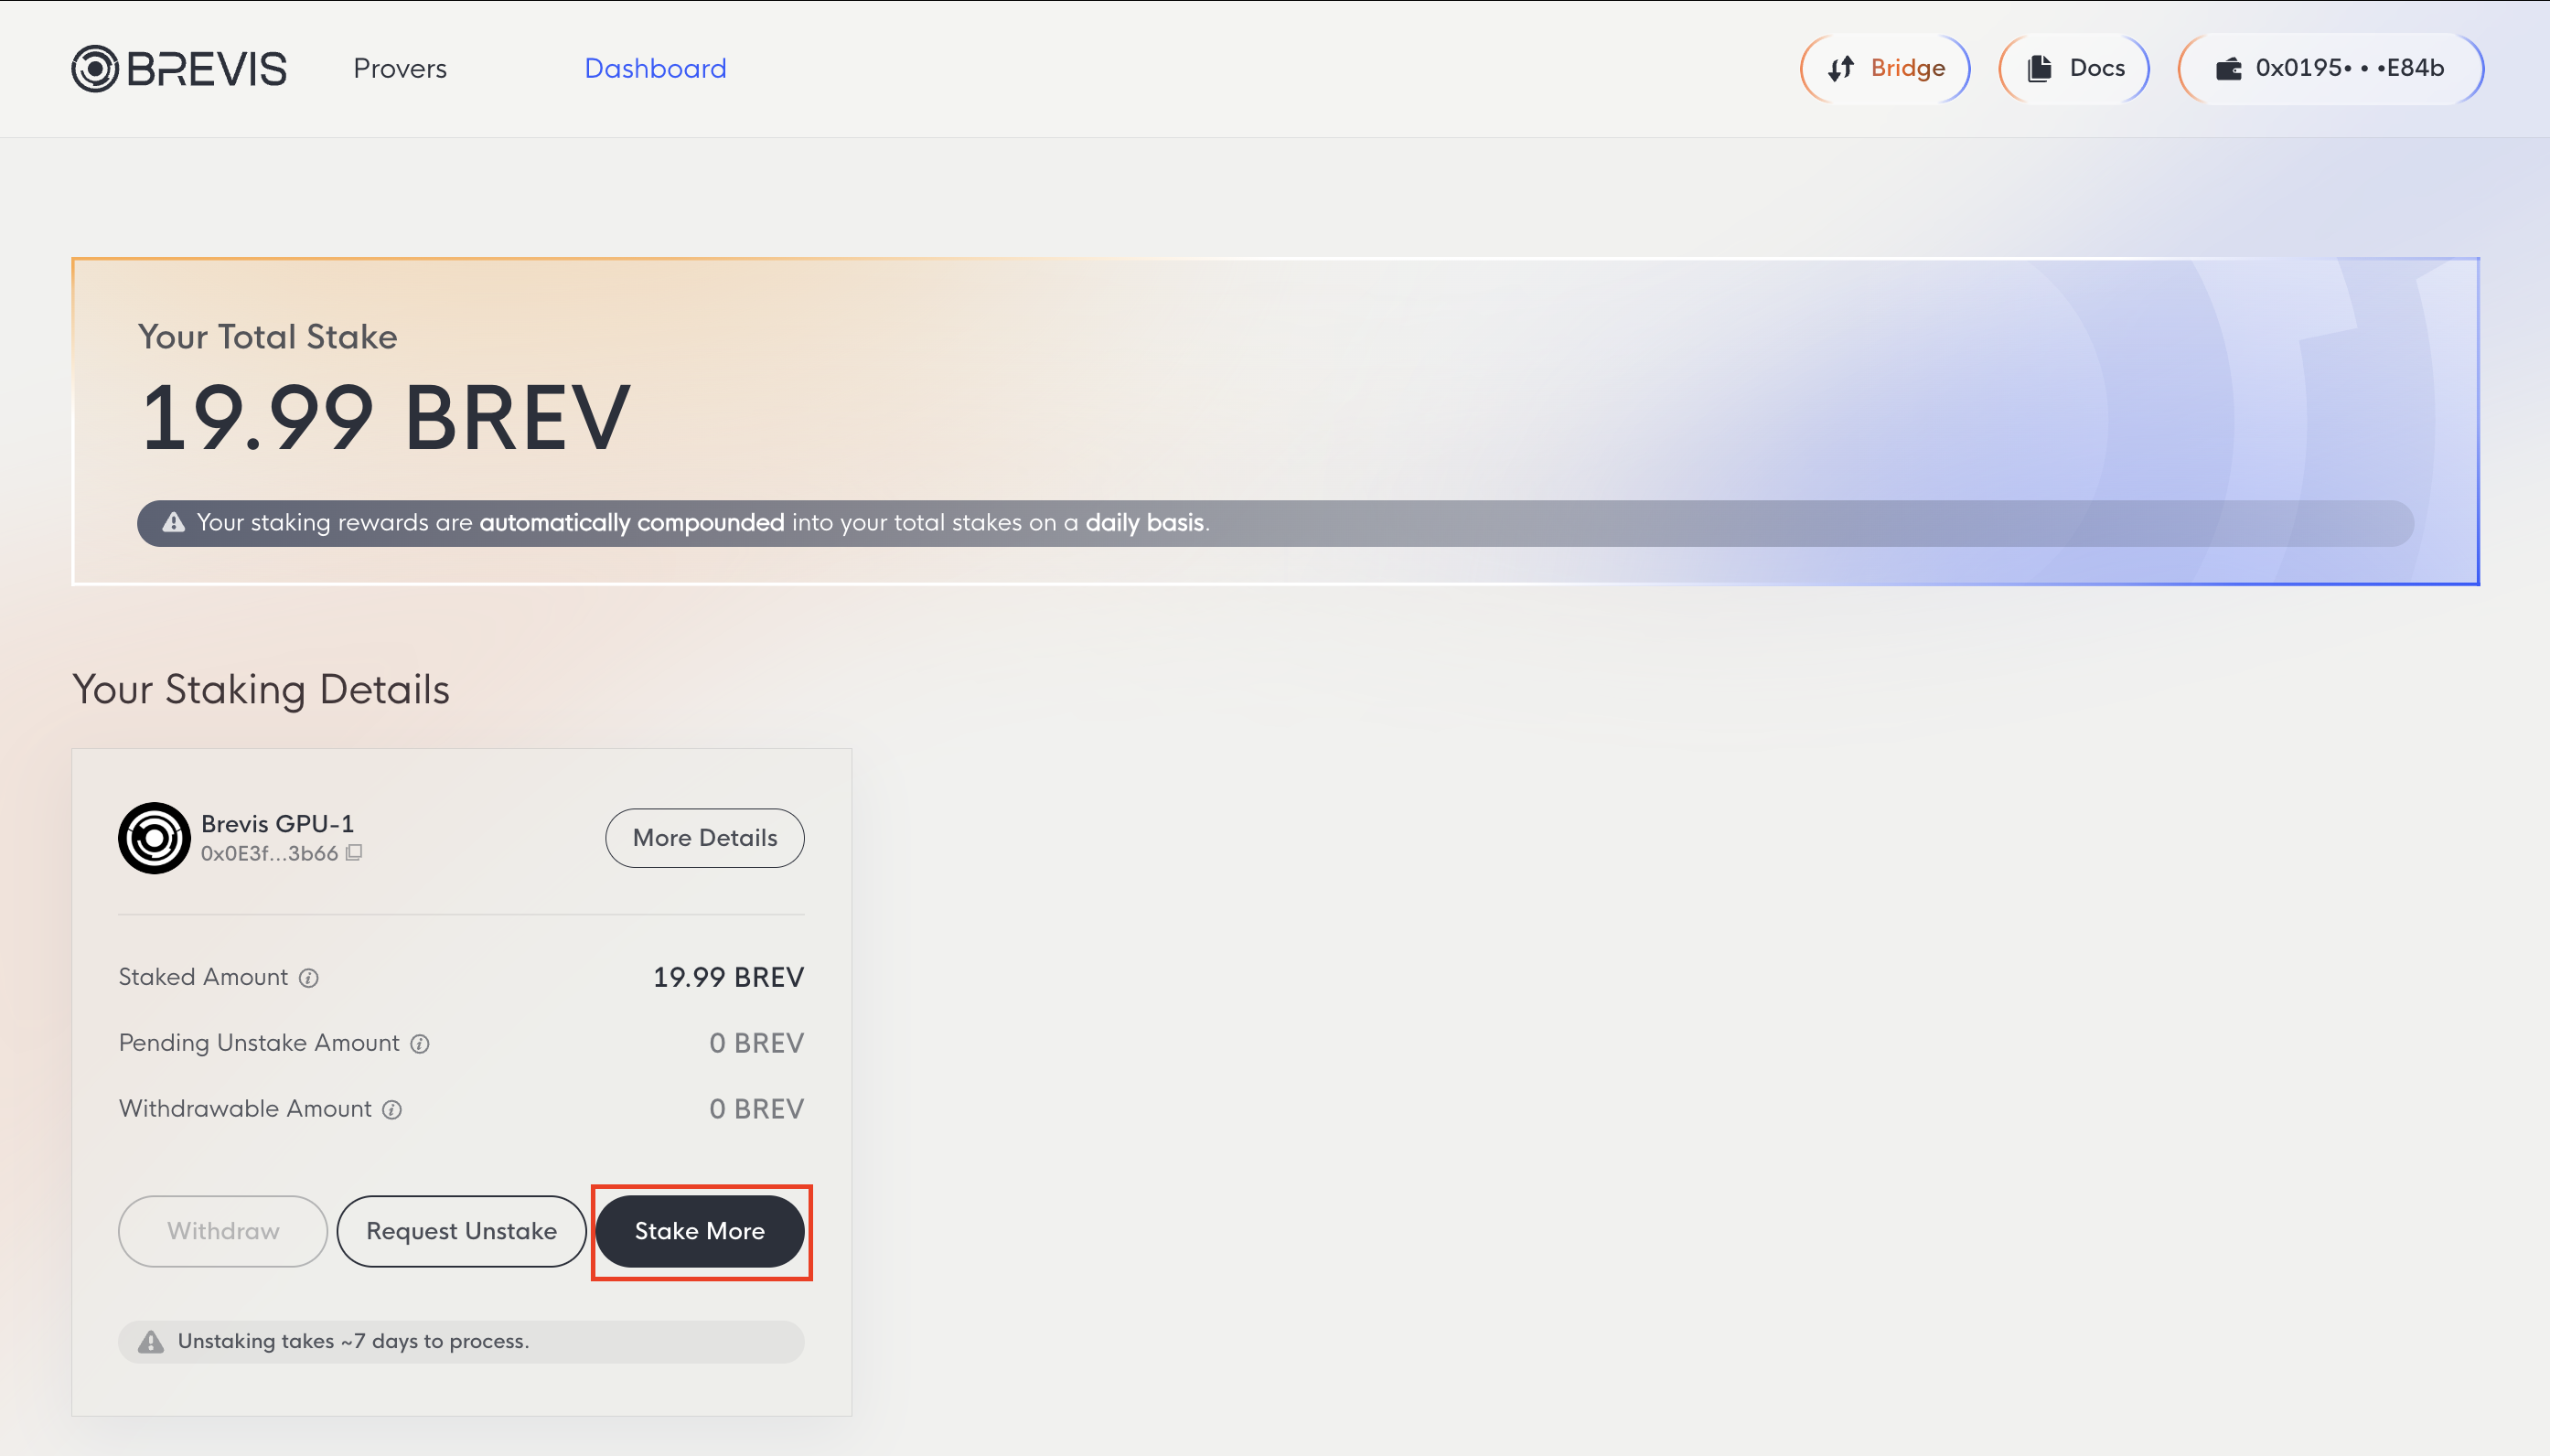
To increase your stake with provers you’ve already delegated to, visit the Dashboard tab and use the Stake More option.
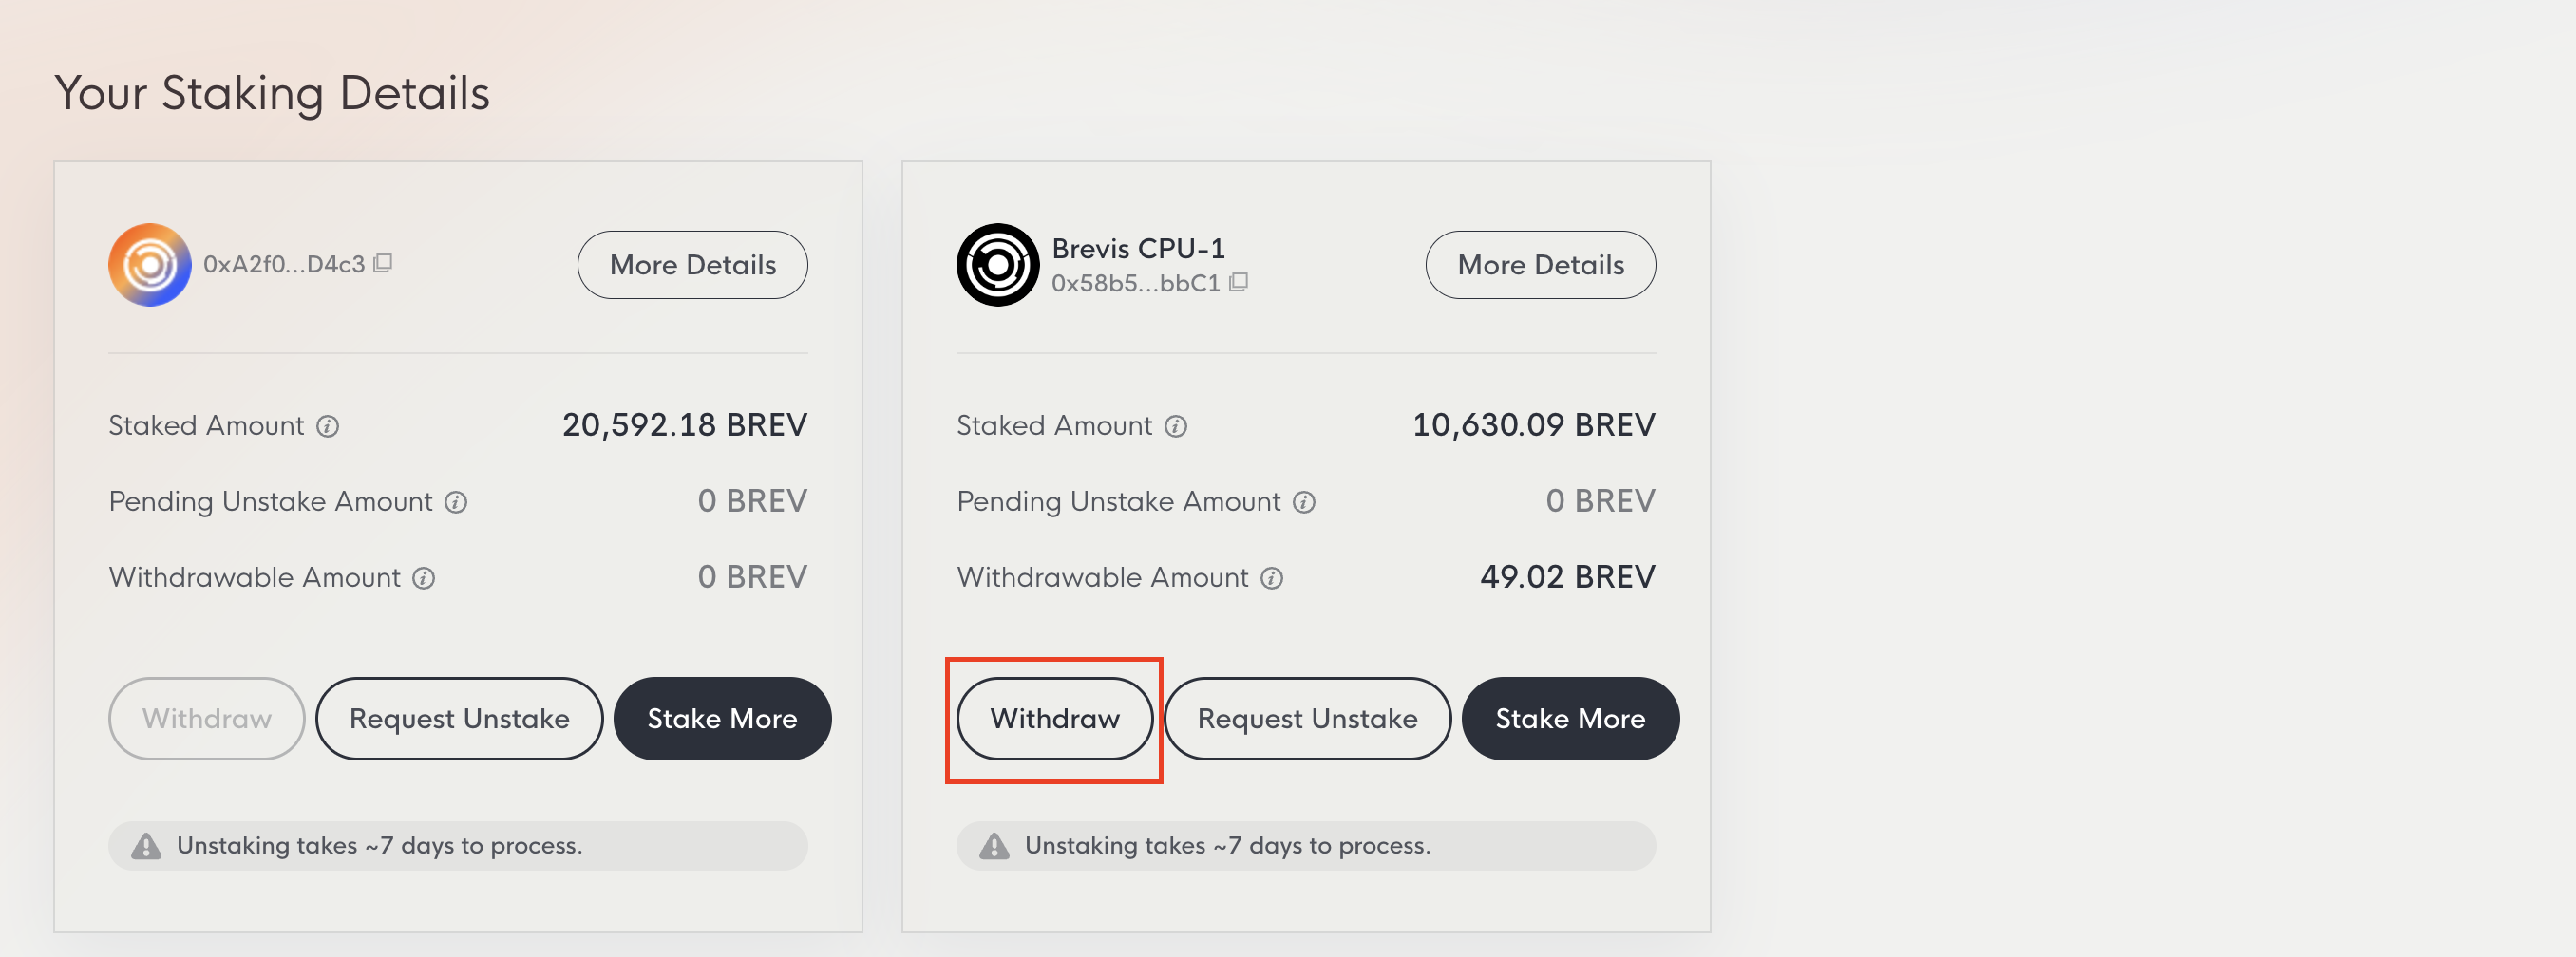
Dashboard
The Dashboard tab displays your total stake and detailed information for each prover, including staked amount, pending unstake amount, and withdrawable amount.
- Your Total Stake: All BREV staked across provers plus earned rewards. Rewards compound automatically on a daily basis.
- Staked Amount: BREV currently staked with a specific prover.
- Pending Unstake Amount: Amount currently in the 7-day unstaking period.
- Withdrawable Amount: Unstaked amount that has passed the 7-day period and is ready to withdraw.
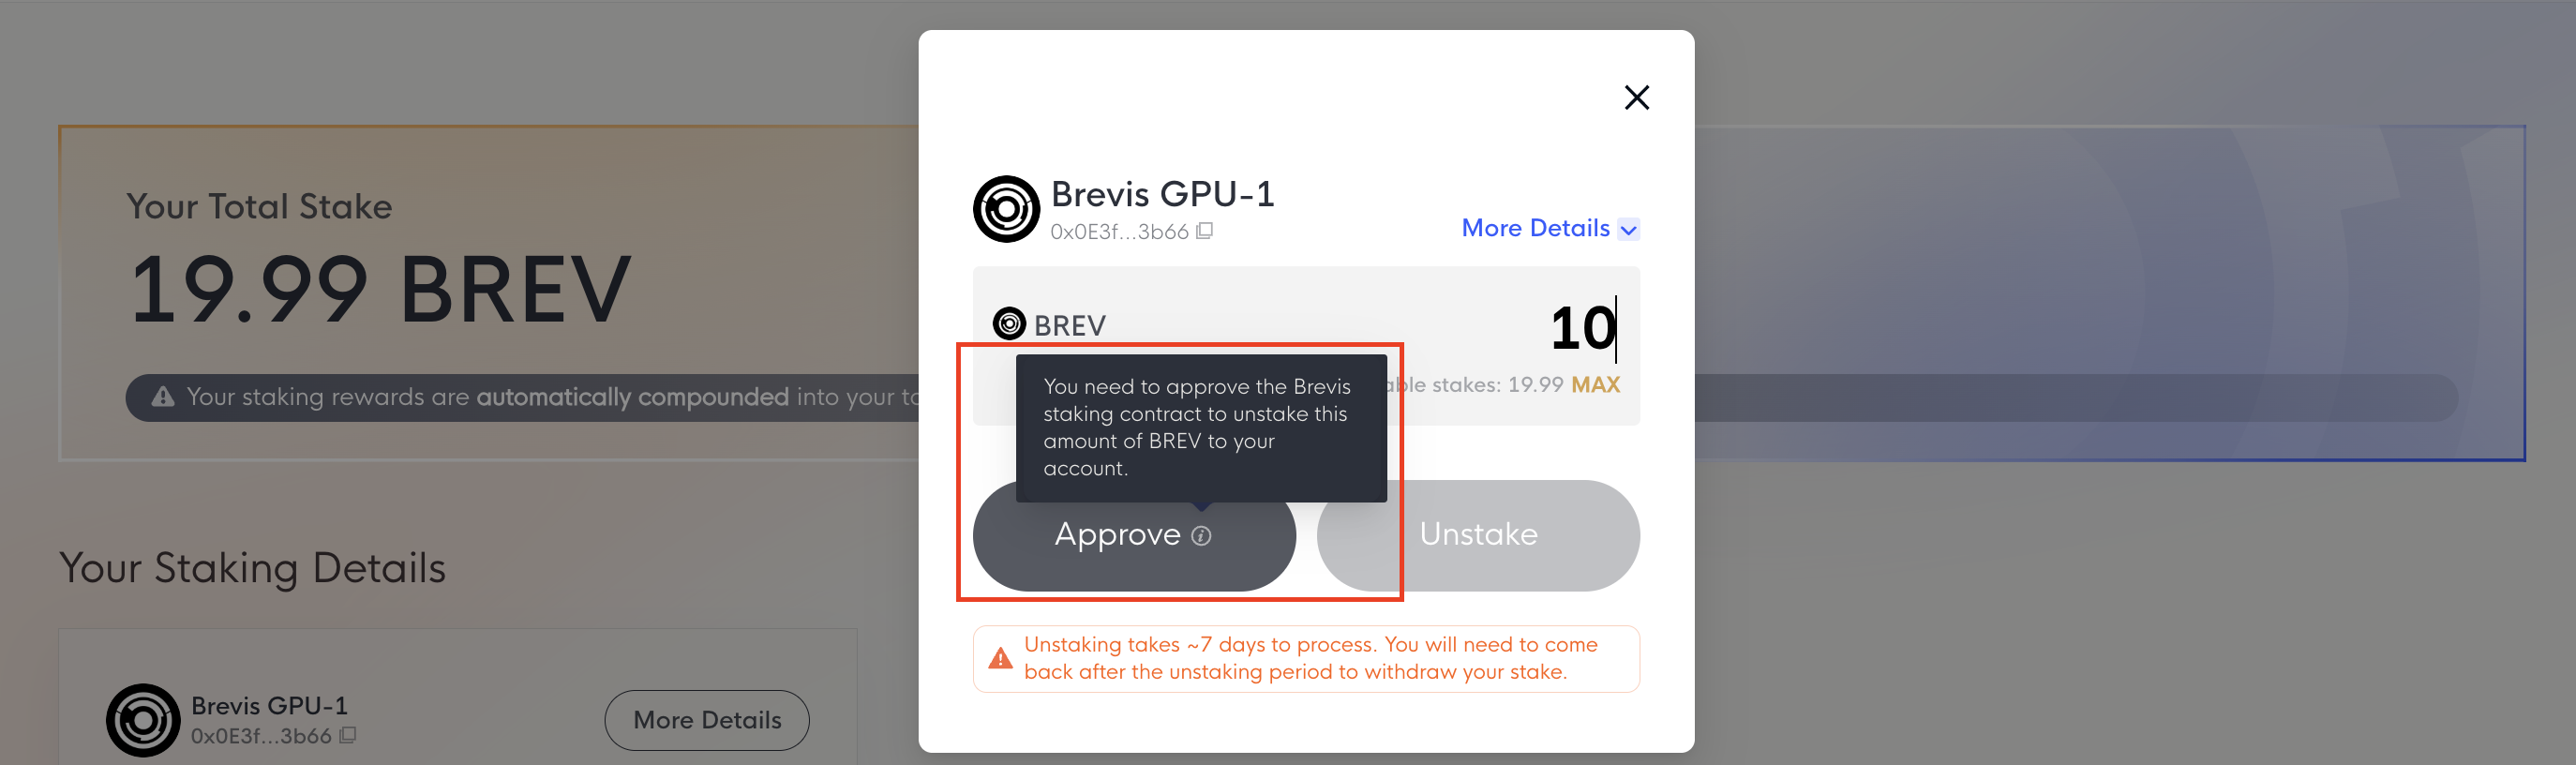
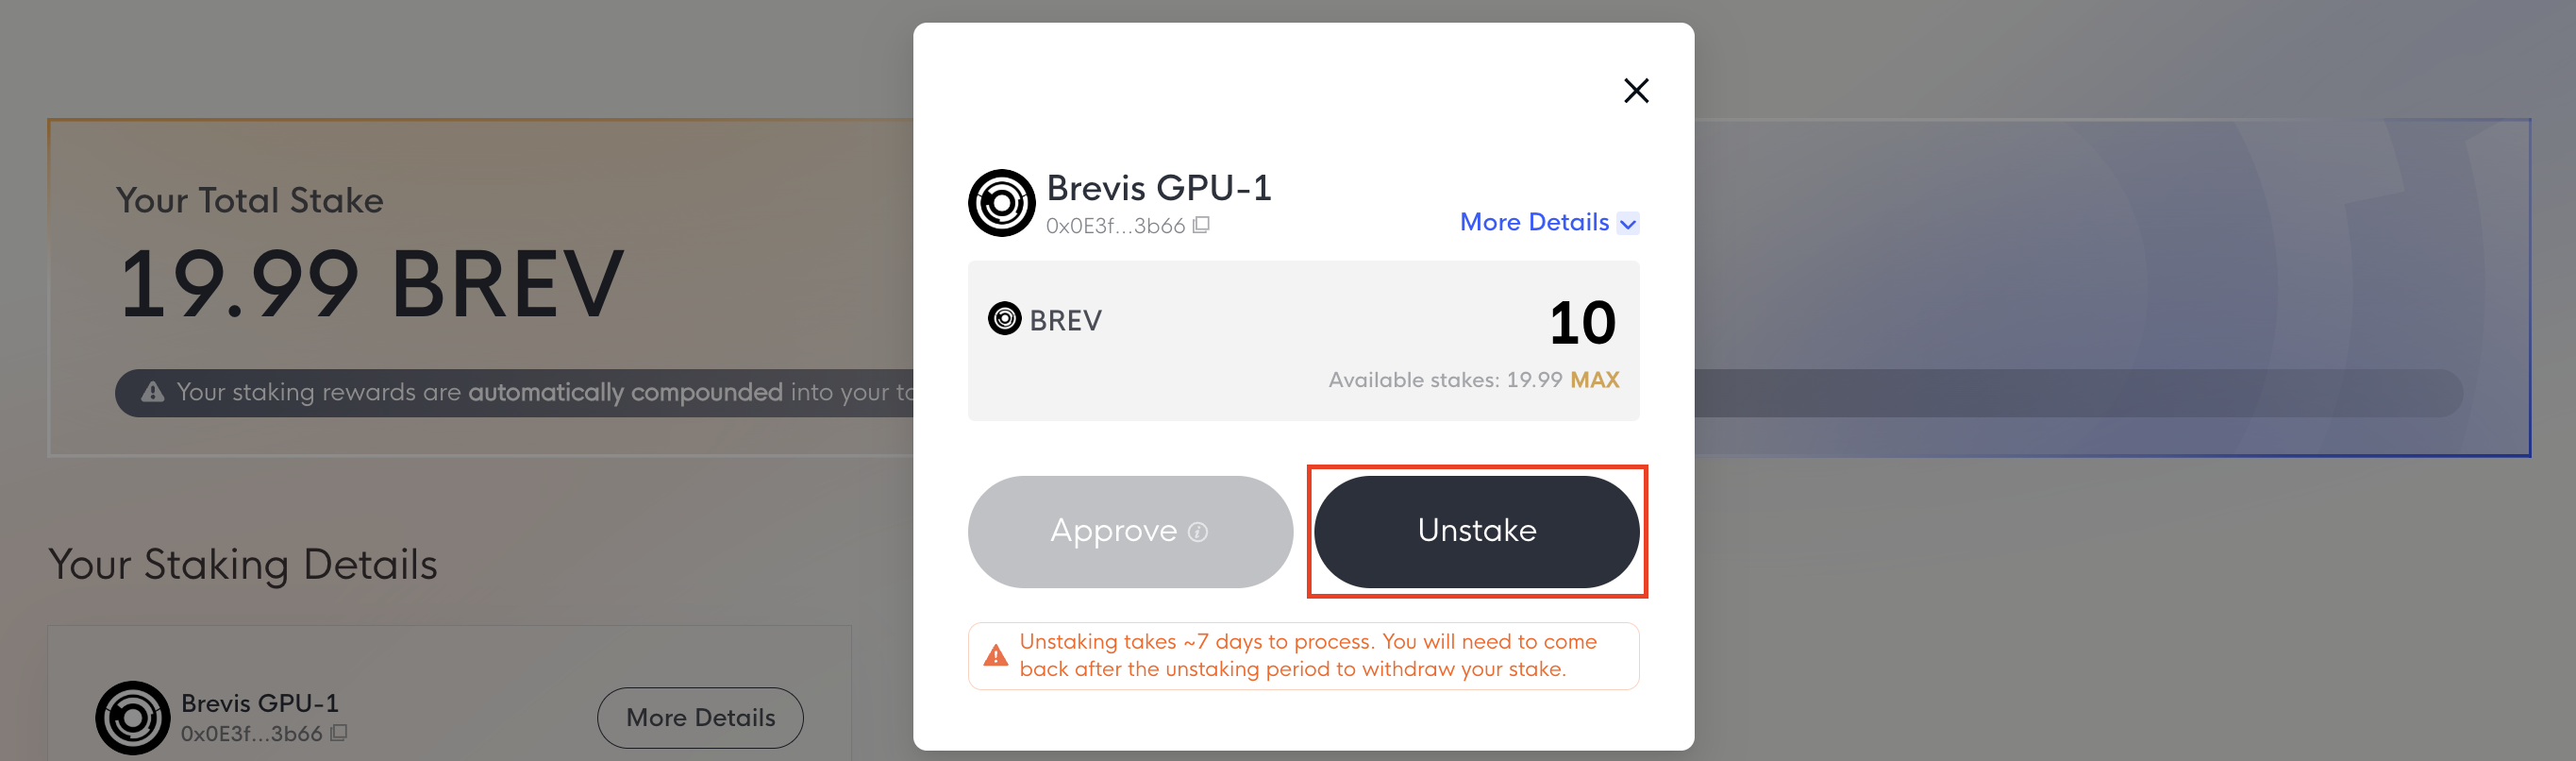
Unstake BREV
You can unstake BREV at any time by clicking the Request Unstake button on the Dashboard page.
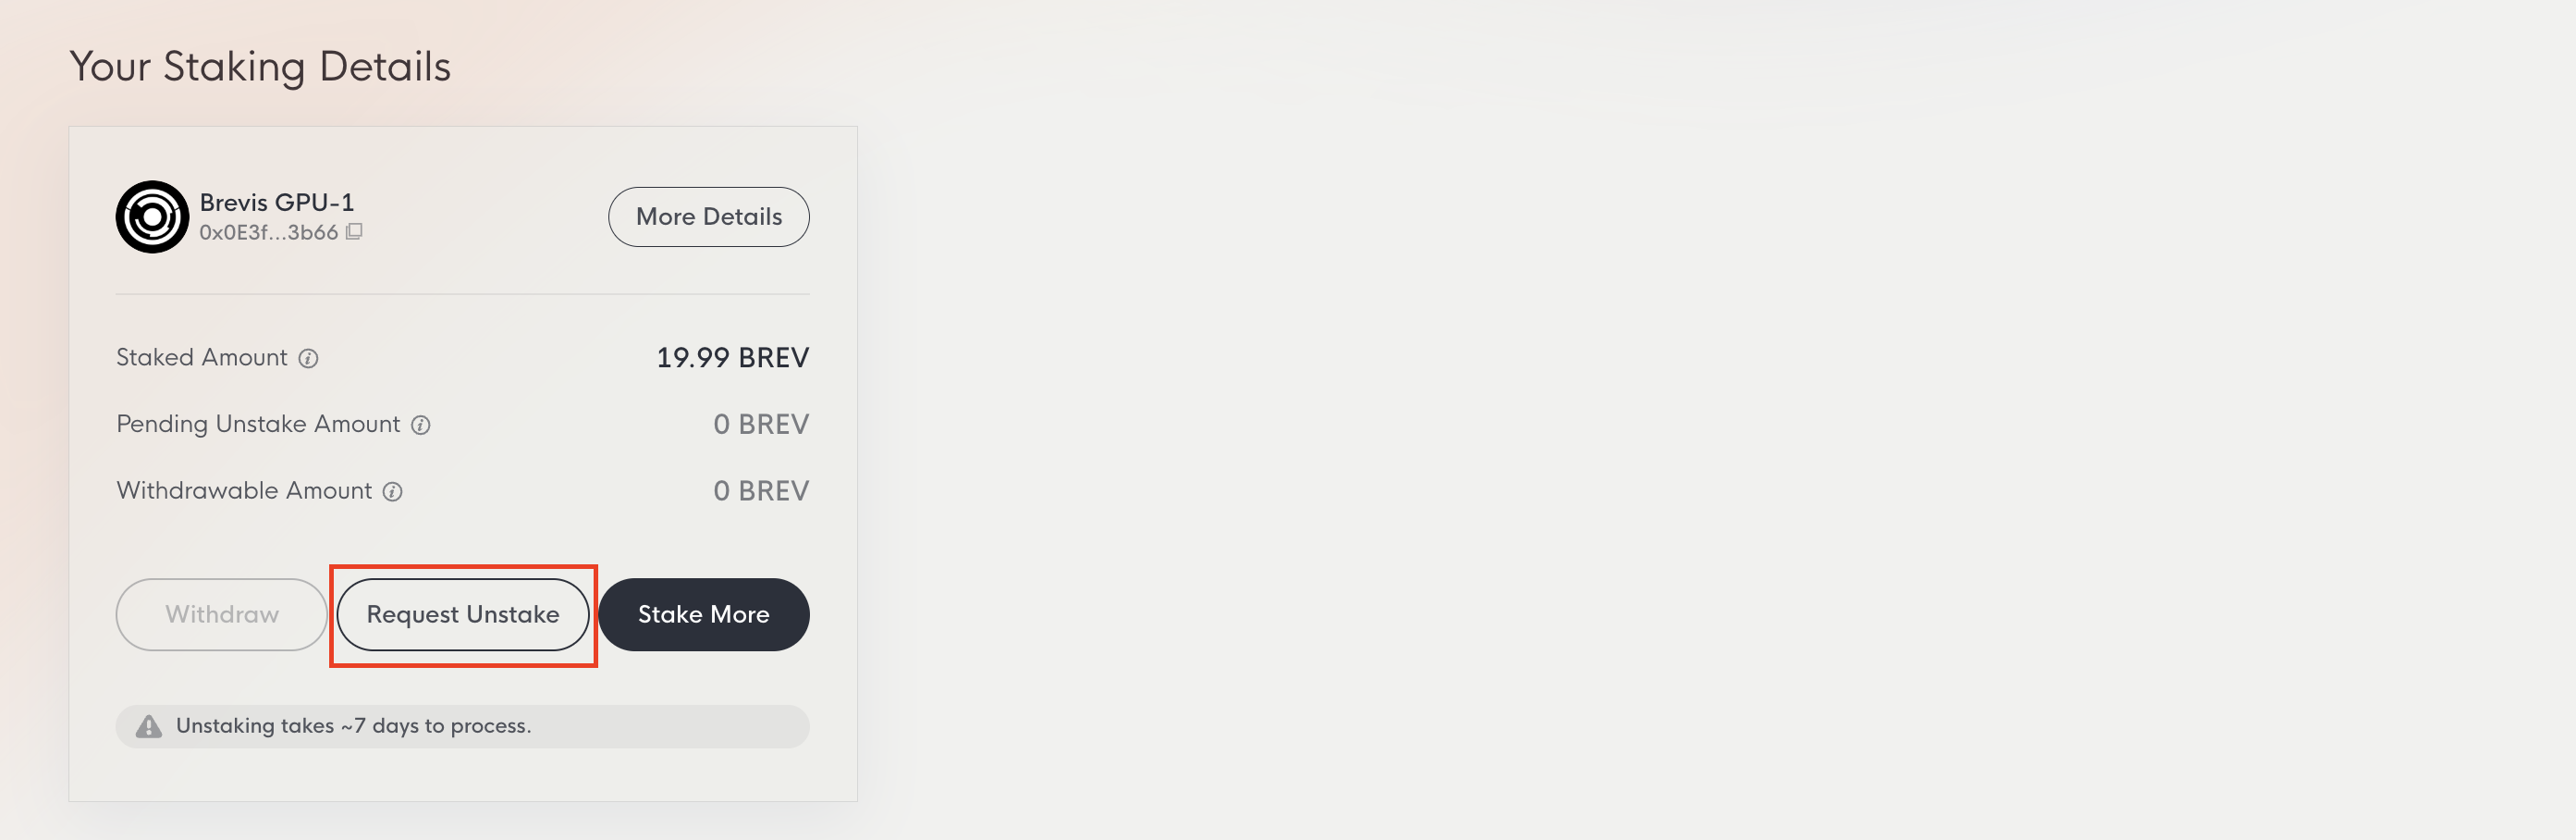
You may need to Approve the Brevis staking contract first. Once approved, submit the unstake transaction. The unstaking period is 7 days. After the waiting period, you can withdraw your BREV.
Withdraw BREV
Once the 7-day period has passed, click the Withdraw button on the Dashboard page to return your BREV to your wallet. The Withdraw button remains disabled if you have no unstaked BREV, or until the waiting period is complete.